Exclusive to Fulfill Engine, LIQUID 3D™ redefines dimensional emblems and unlocks on-demand decoration without costly setups or minimum quantity requirements. This innovative patent-pending technology from STAHLS' combines high-definition, full color 3D printing with versatile finishes and textures that make any logo look and feel like nothing else.
- Made in USA: Printed and applied domestically for quality and reliability
- Patent-Pending Technology: Innovative emblems developed by STAHLS'
- No Minimums: Perfect for single pieces or large-scale orders
- Quick Turnarounds: Ships in as little as 5 business days
- Real-Time Design: Adjust depth, colors, gradients and textures with instant proofs
Availability
-
Fulfillment: Fulfill Engine Network only
- Catalog Products: hats and bags
-
Order Sources:
-
Order portal
-
White-label stores
-
OMG integrated stores
-
Shopify integrated stores
- API and Import, if referencing a Fulfill Engine design ID
-
Getting started
- Create LIQUID 3D artwork, for an account or store (View artwork > Add > Add LIQUID 3D artwork). To learn more, see detailed steps and video below.
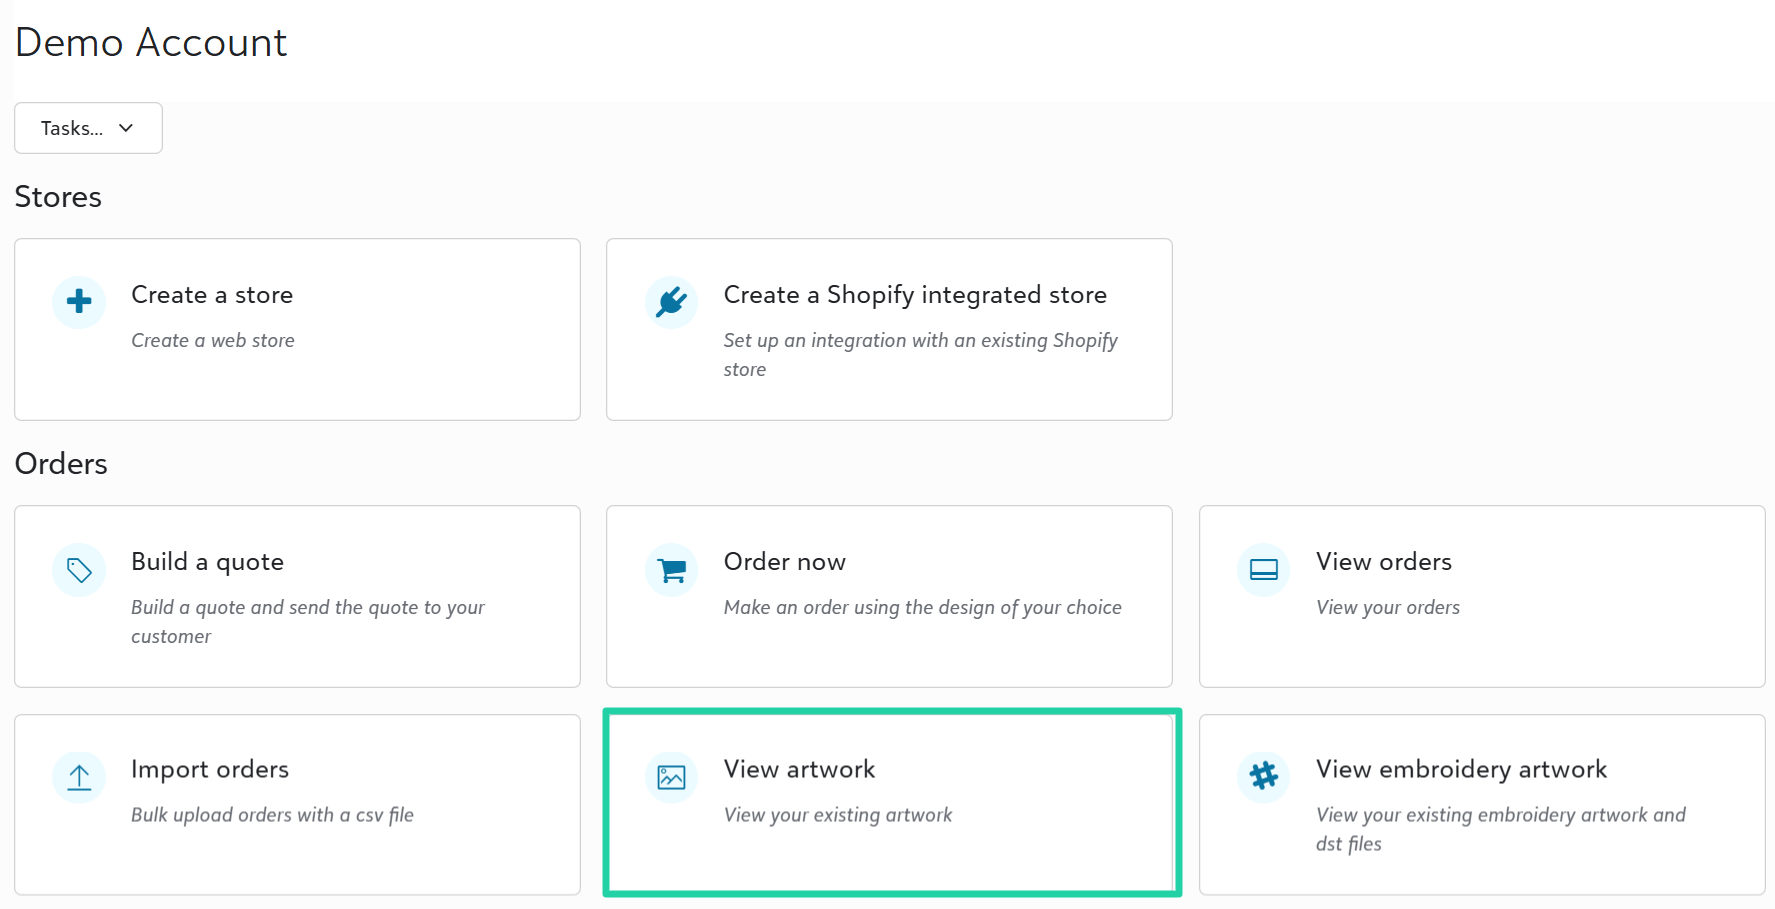

- Add LIQUID 3D products to stores or through the Order now option on an account.
- Buy a few sample products. Begin selling in stores or directly with Order now.
Creating LIQUID 3D artwork
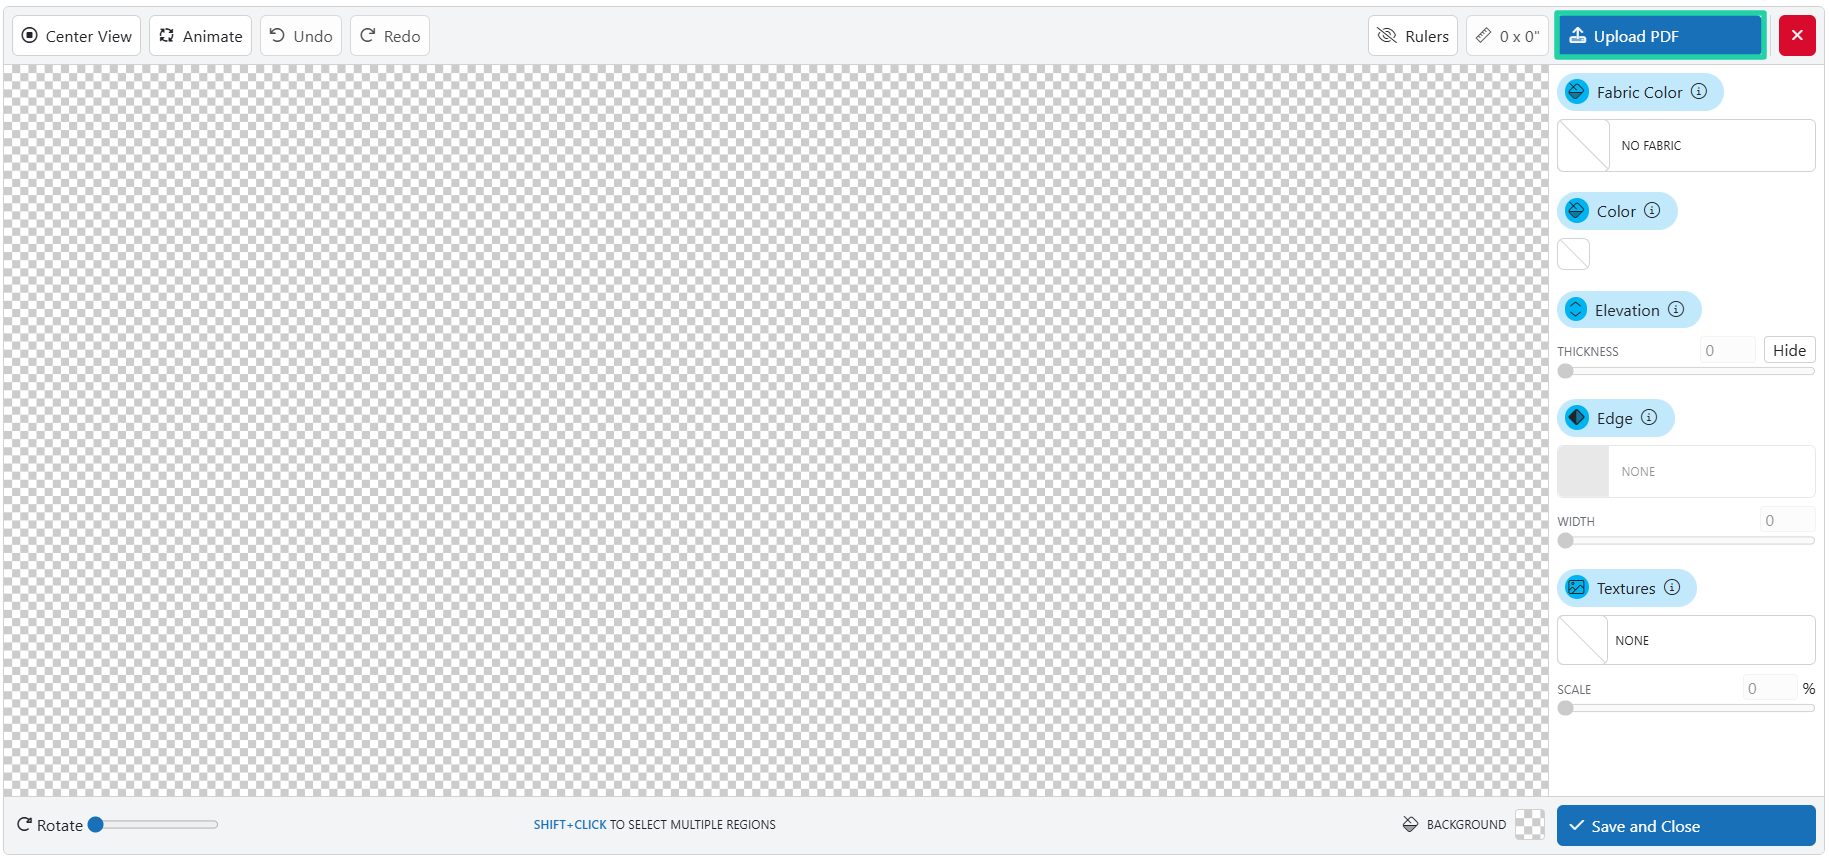
To create LIQUID 3D artwork using the real-time builder,
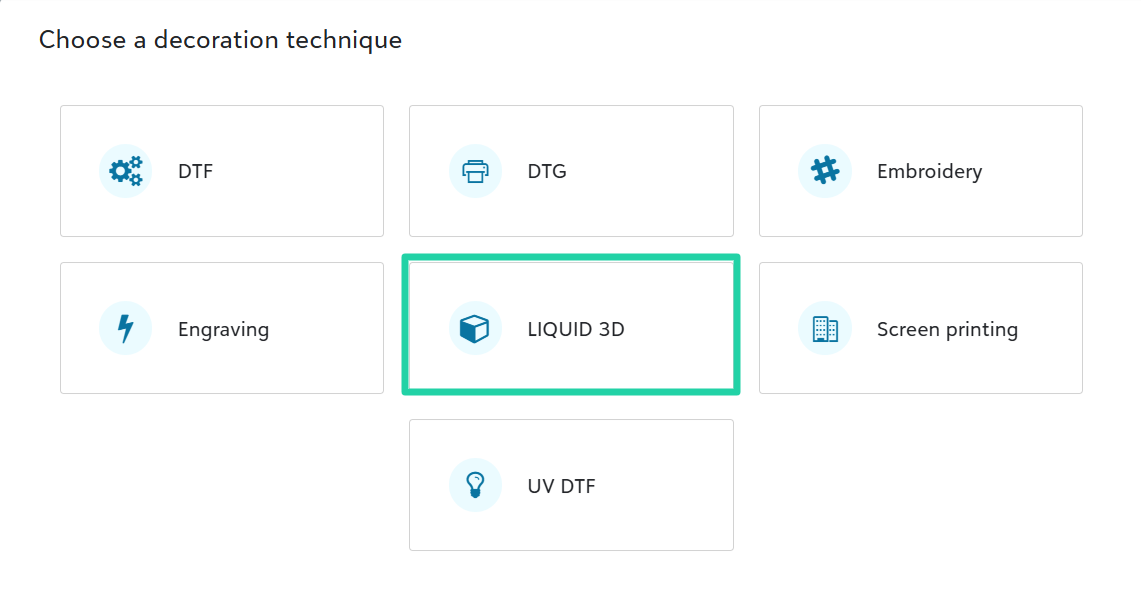
- On your account or store, click View artwork > Add > Add LIQUID 3D artwork > Upload PDF. You must upload a vector .pdf file.
- On the Import Design form, adjust the size to fit within the allowed dimensions of 2.375 x 4 inches.
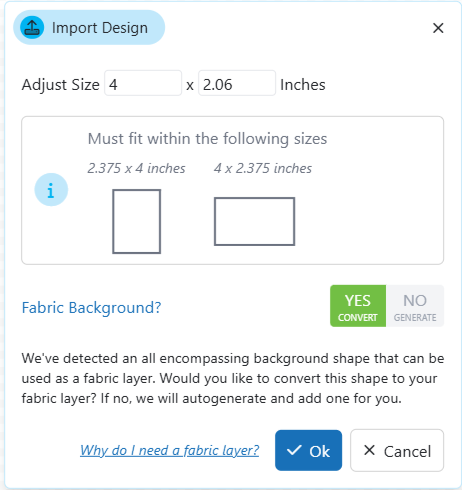
- LIQUID 3D emblems include a fabric layer. If your uploaded file has an all encompassing background shape that can be used as a fabric layer, then you'll be prompted to select YES CONVERT to convert your background shape to a fabric layer or NO GENERATE to autogenerate a fabric layer.
To learn more about LIQUID 3D fabric layers, click here. - Select different objects or colors on your logo. Use the design options on the right pane to customize the look and feel.
- Fabric Color: Set to black or white
- Fabric Holes: Remove holes (if applicable)
- Color: Choose from available palette and gradient options
- Elevation: Adjust between 1.25mm and 2.5mm, or hide the selected object(s) and have the fabric layer show through
- Edge: Add rounded or beveled edge effects
- Textures: Choose textures to add fully tactile detail
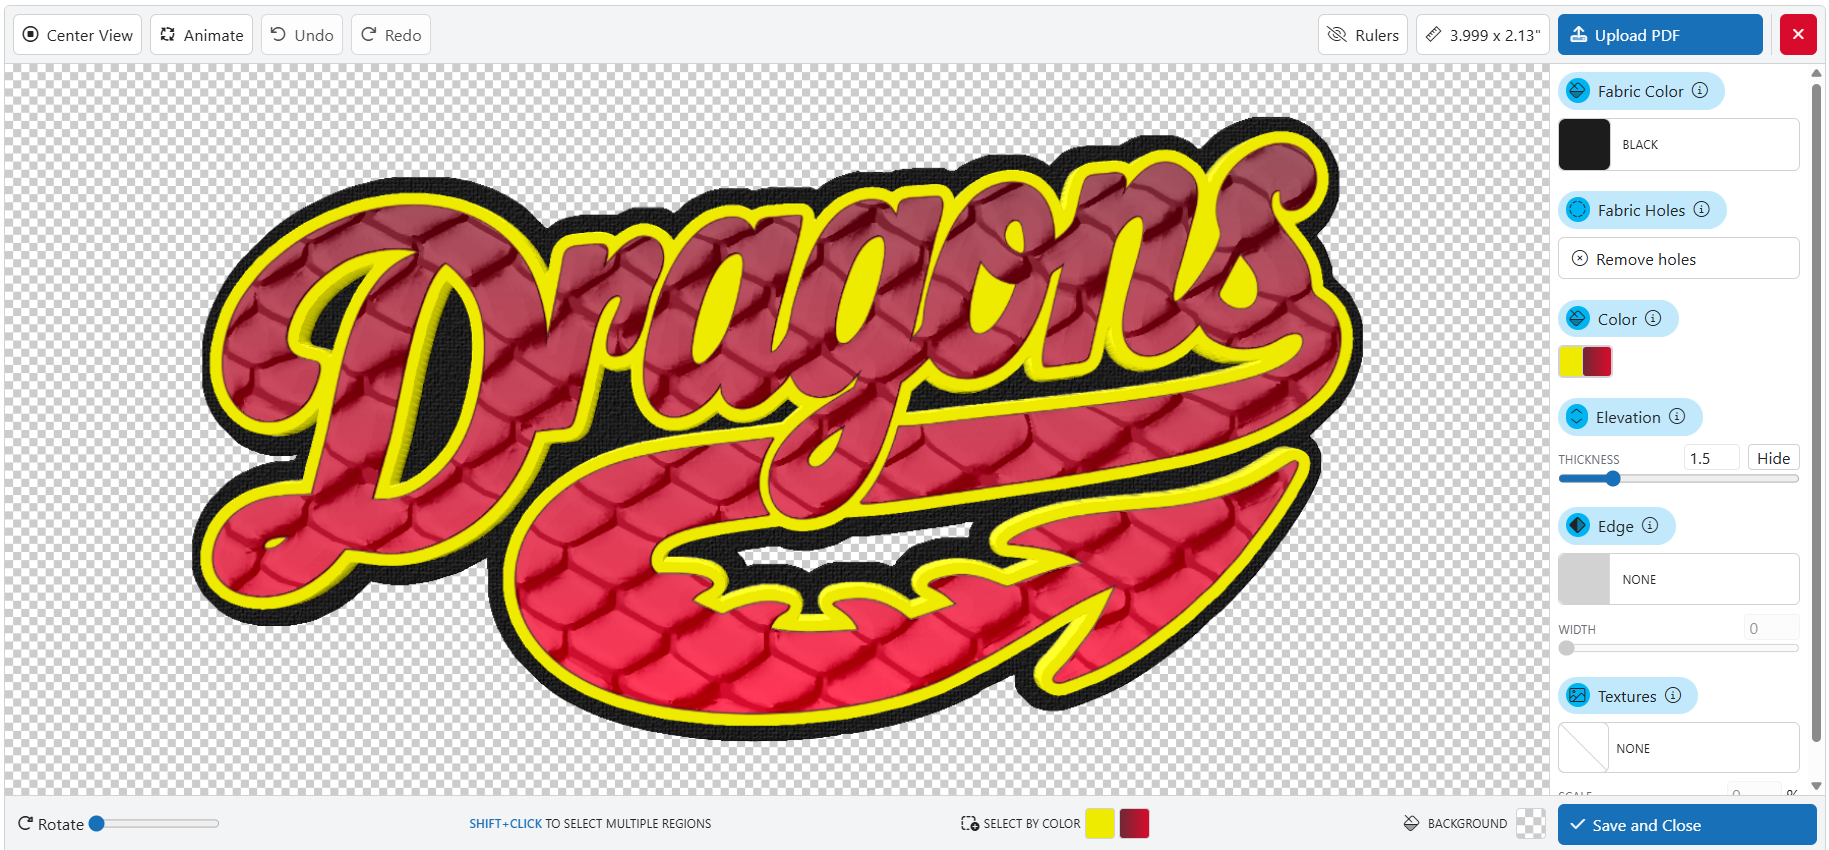
- Click Save and Close to save your LIQUID 3D artwork file to your account or store.
Image trace tips
How can I convert a PNG, JPG, or WEBP file to vector?
There are two methods for converting artwork from a raster image such as JPG, PNG, WEBP to a vector file.
- Get the art redrawn by a trained professional digital artist.
- Use a tool such as Adobe Illustrator's Image trace.
Image Trace (also called Power Trace, Auto Trace, or Trace Bitmap) is a tool that can convert image files like jpg, png, webp format to vector graphics pdf, svg, eps. If used correctly it can be a powerful tool that saves a lot of time, but if used incorrectly, it can cause many issues within the Liquid3D tool and other programs.
Logos pulled from social media or company websites are often unsuitable for image trace due to their small scale and low resolution. You will be better off getting these logos re-created professionally. Full color photos are also not suitable for image trace as they often result in many small shapes that can cause problems in a variety of programs, including Liquid3D.
How to use Image Trace in Adobe Illustrator 2026
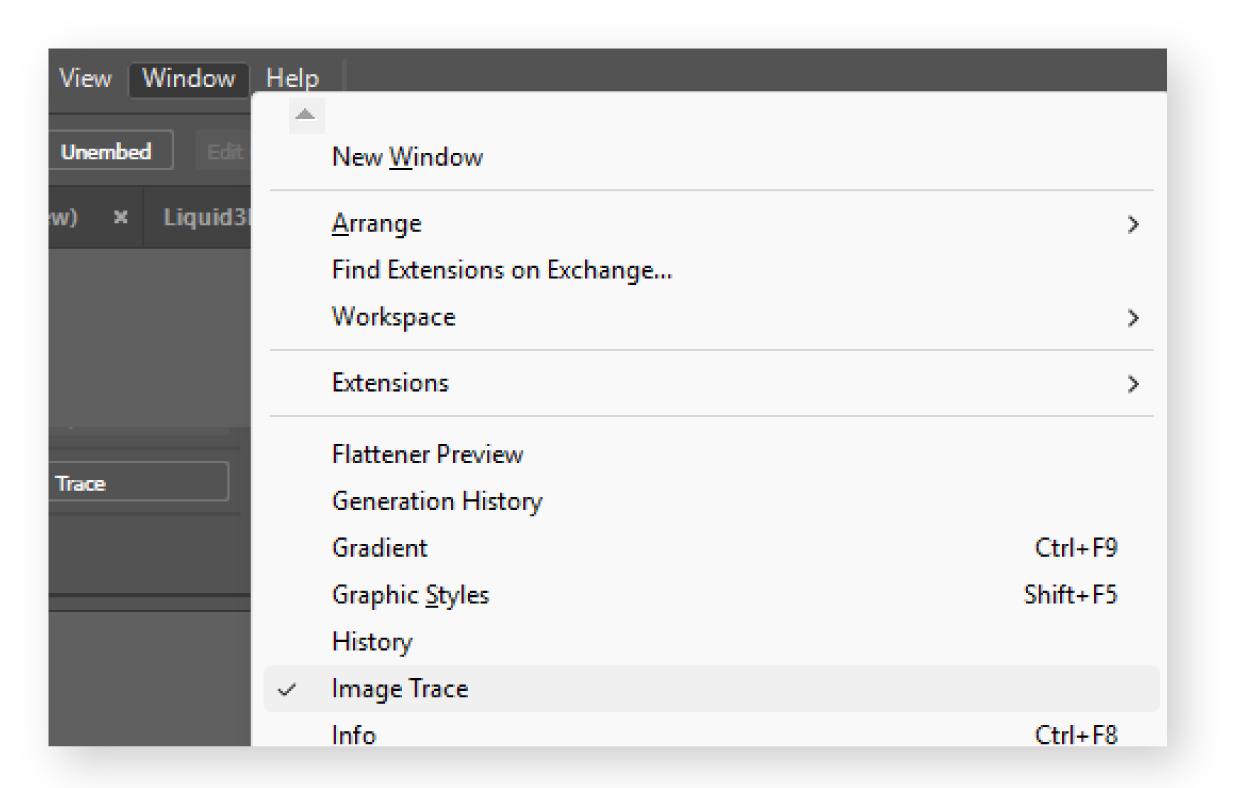
Once you have a large, high resolution file, got to Window > Image Trace.
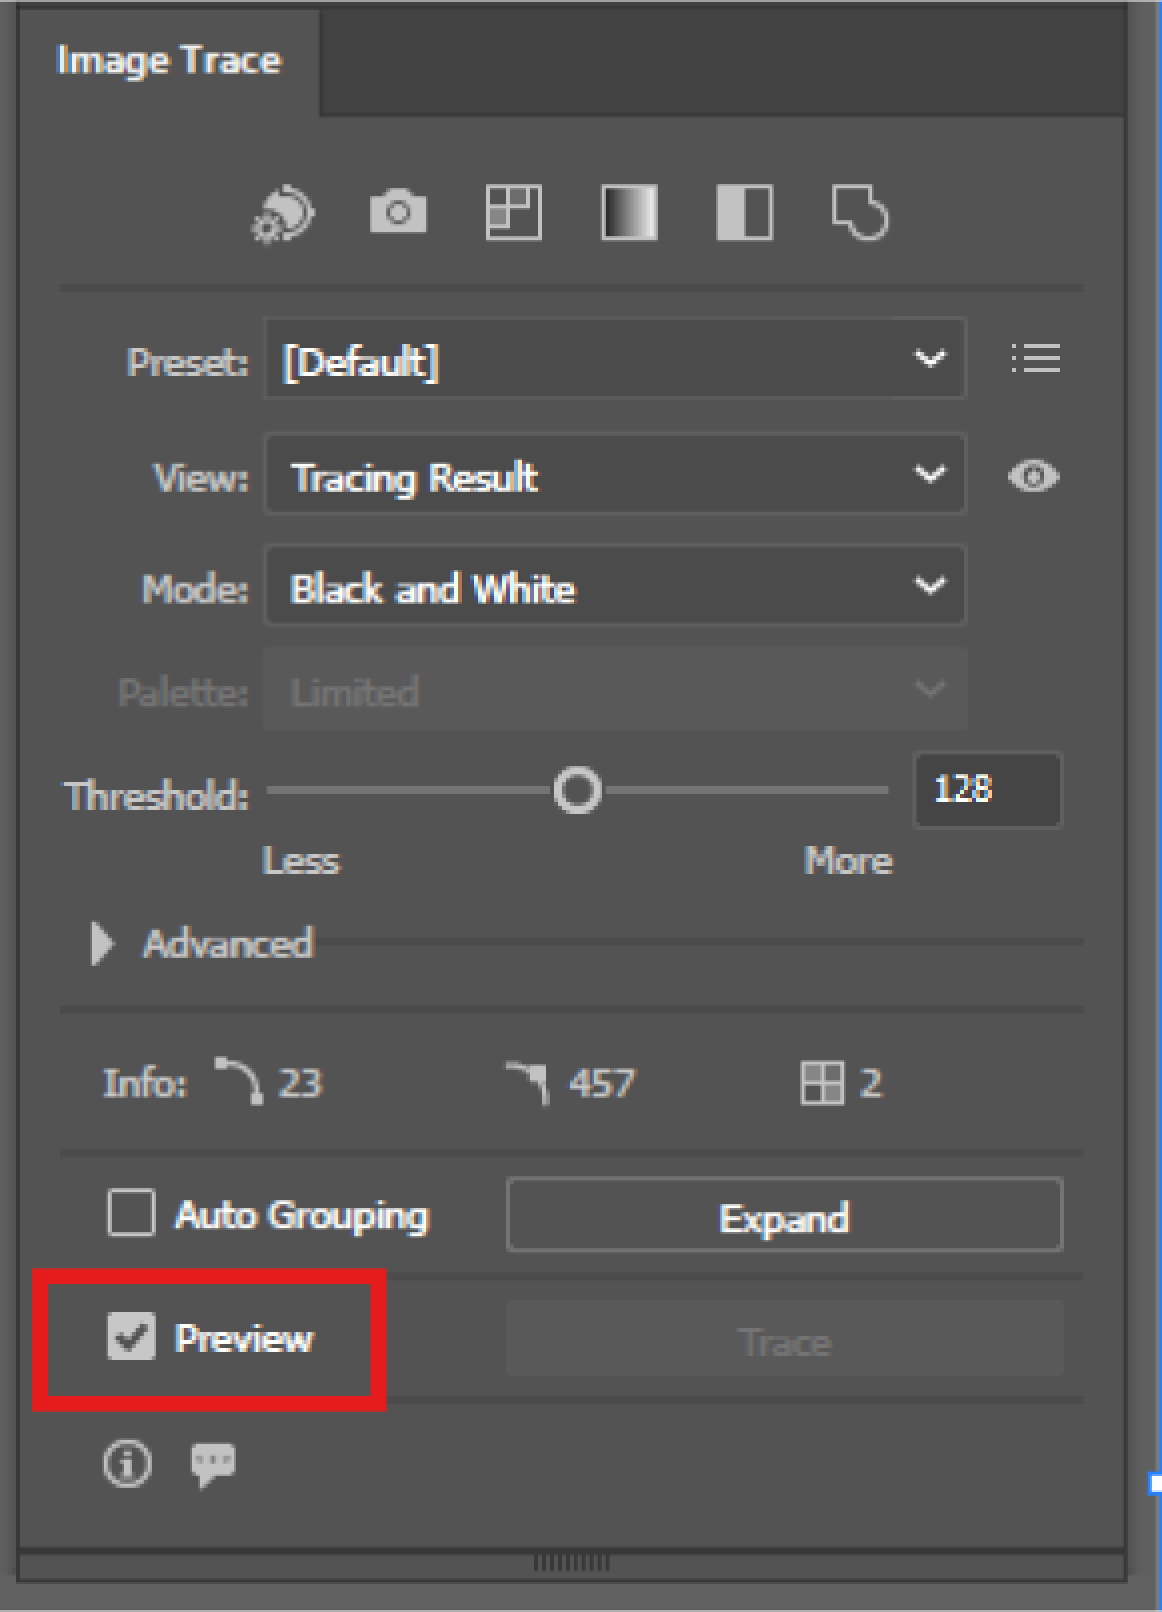
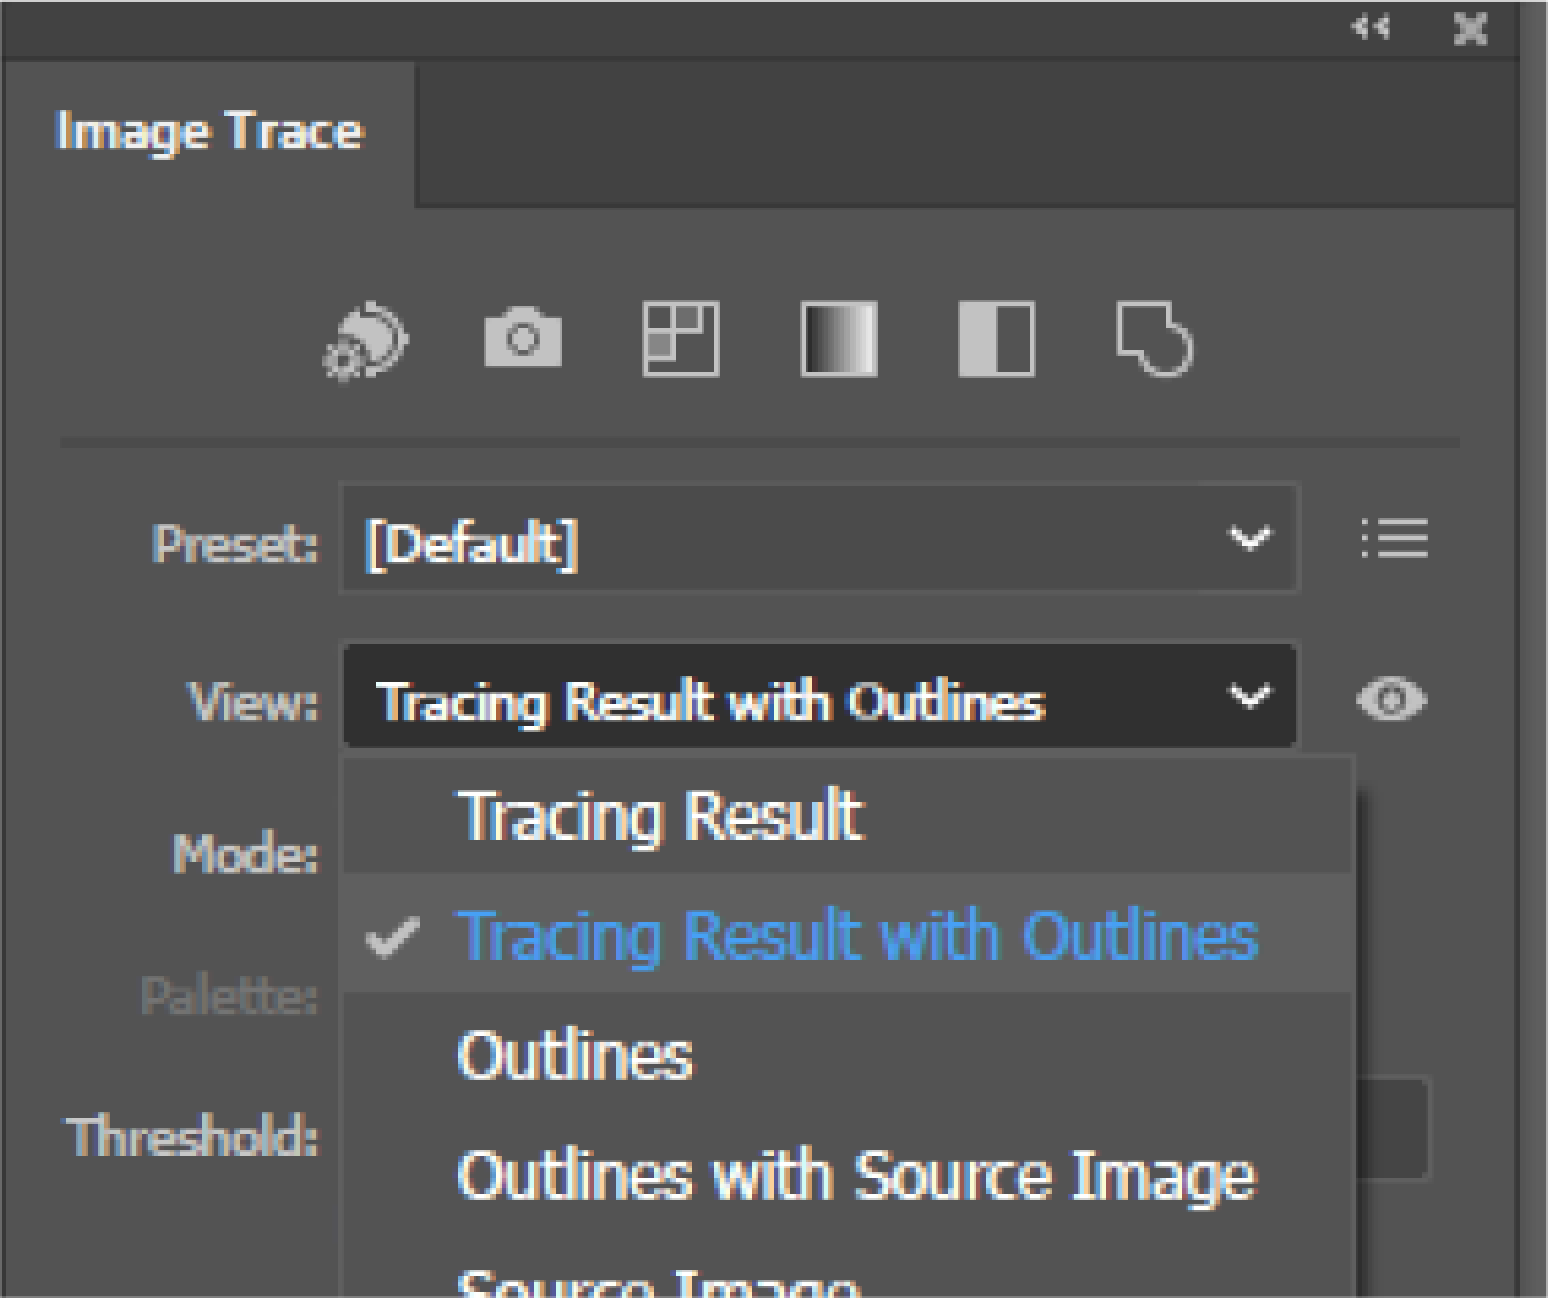
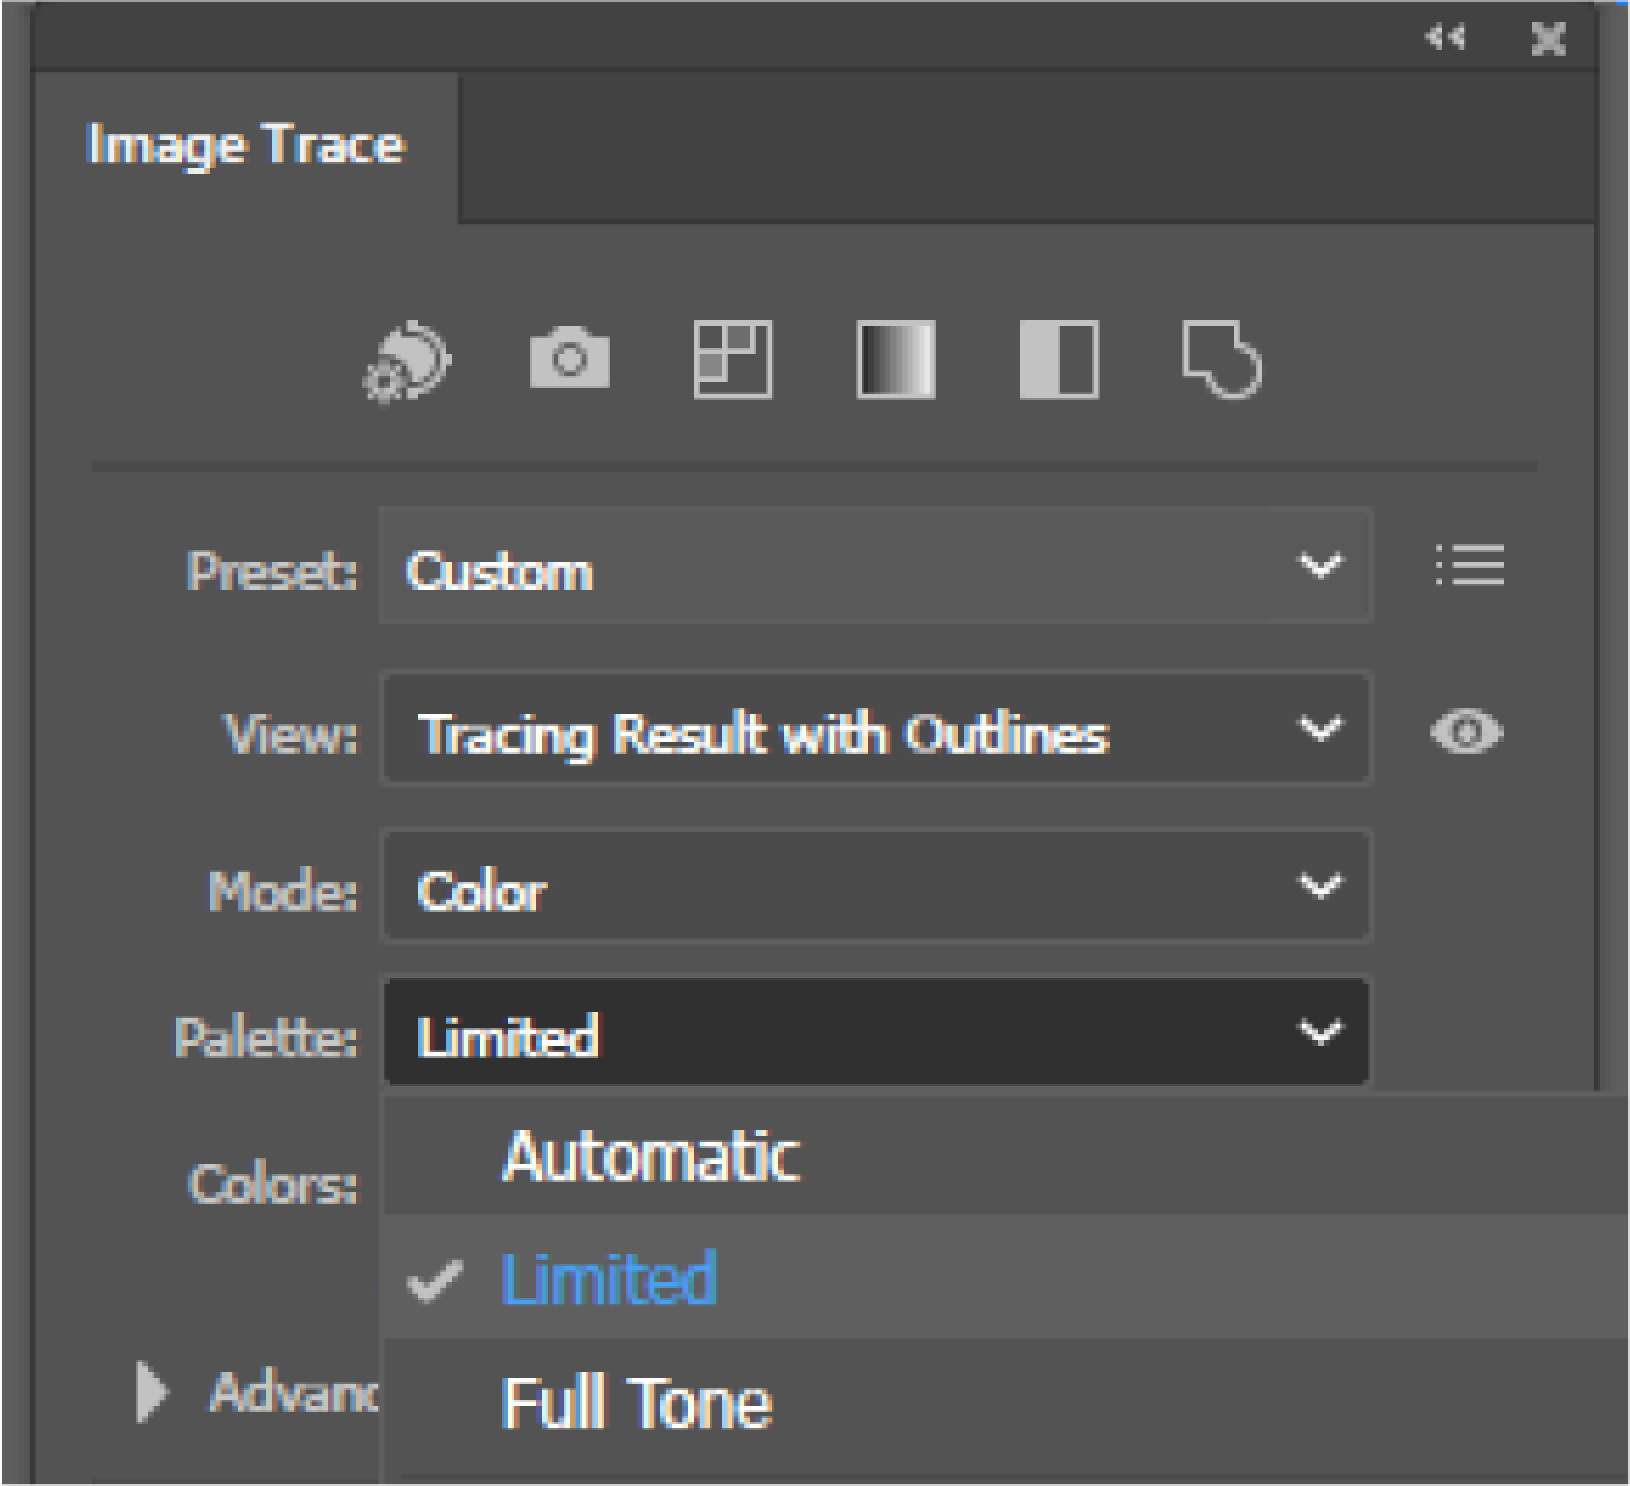
Select the image you want to trace and the trace options will appear in the trace window. Check the box for preview then set your view mode to Tracing Result with Outlines. This will help you see what shapes are actually being created during image trace and can help prevent unwanted extra shapes that can cause issues later on.
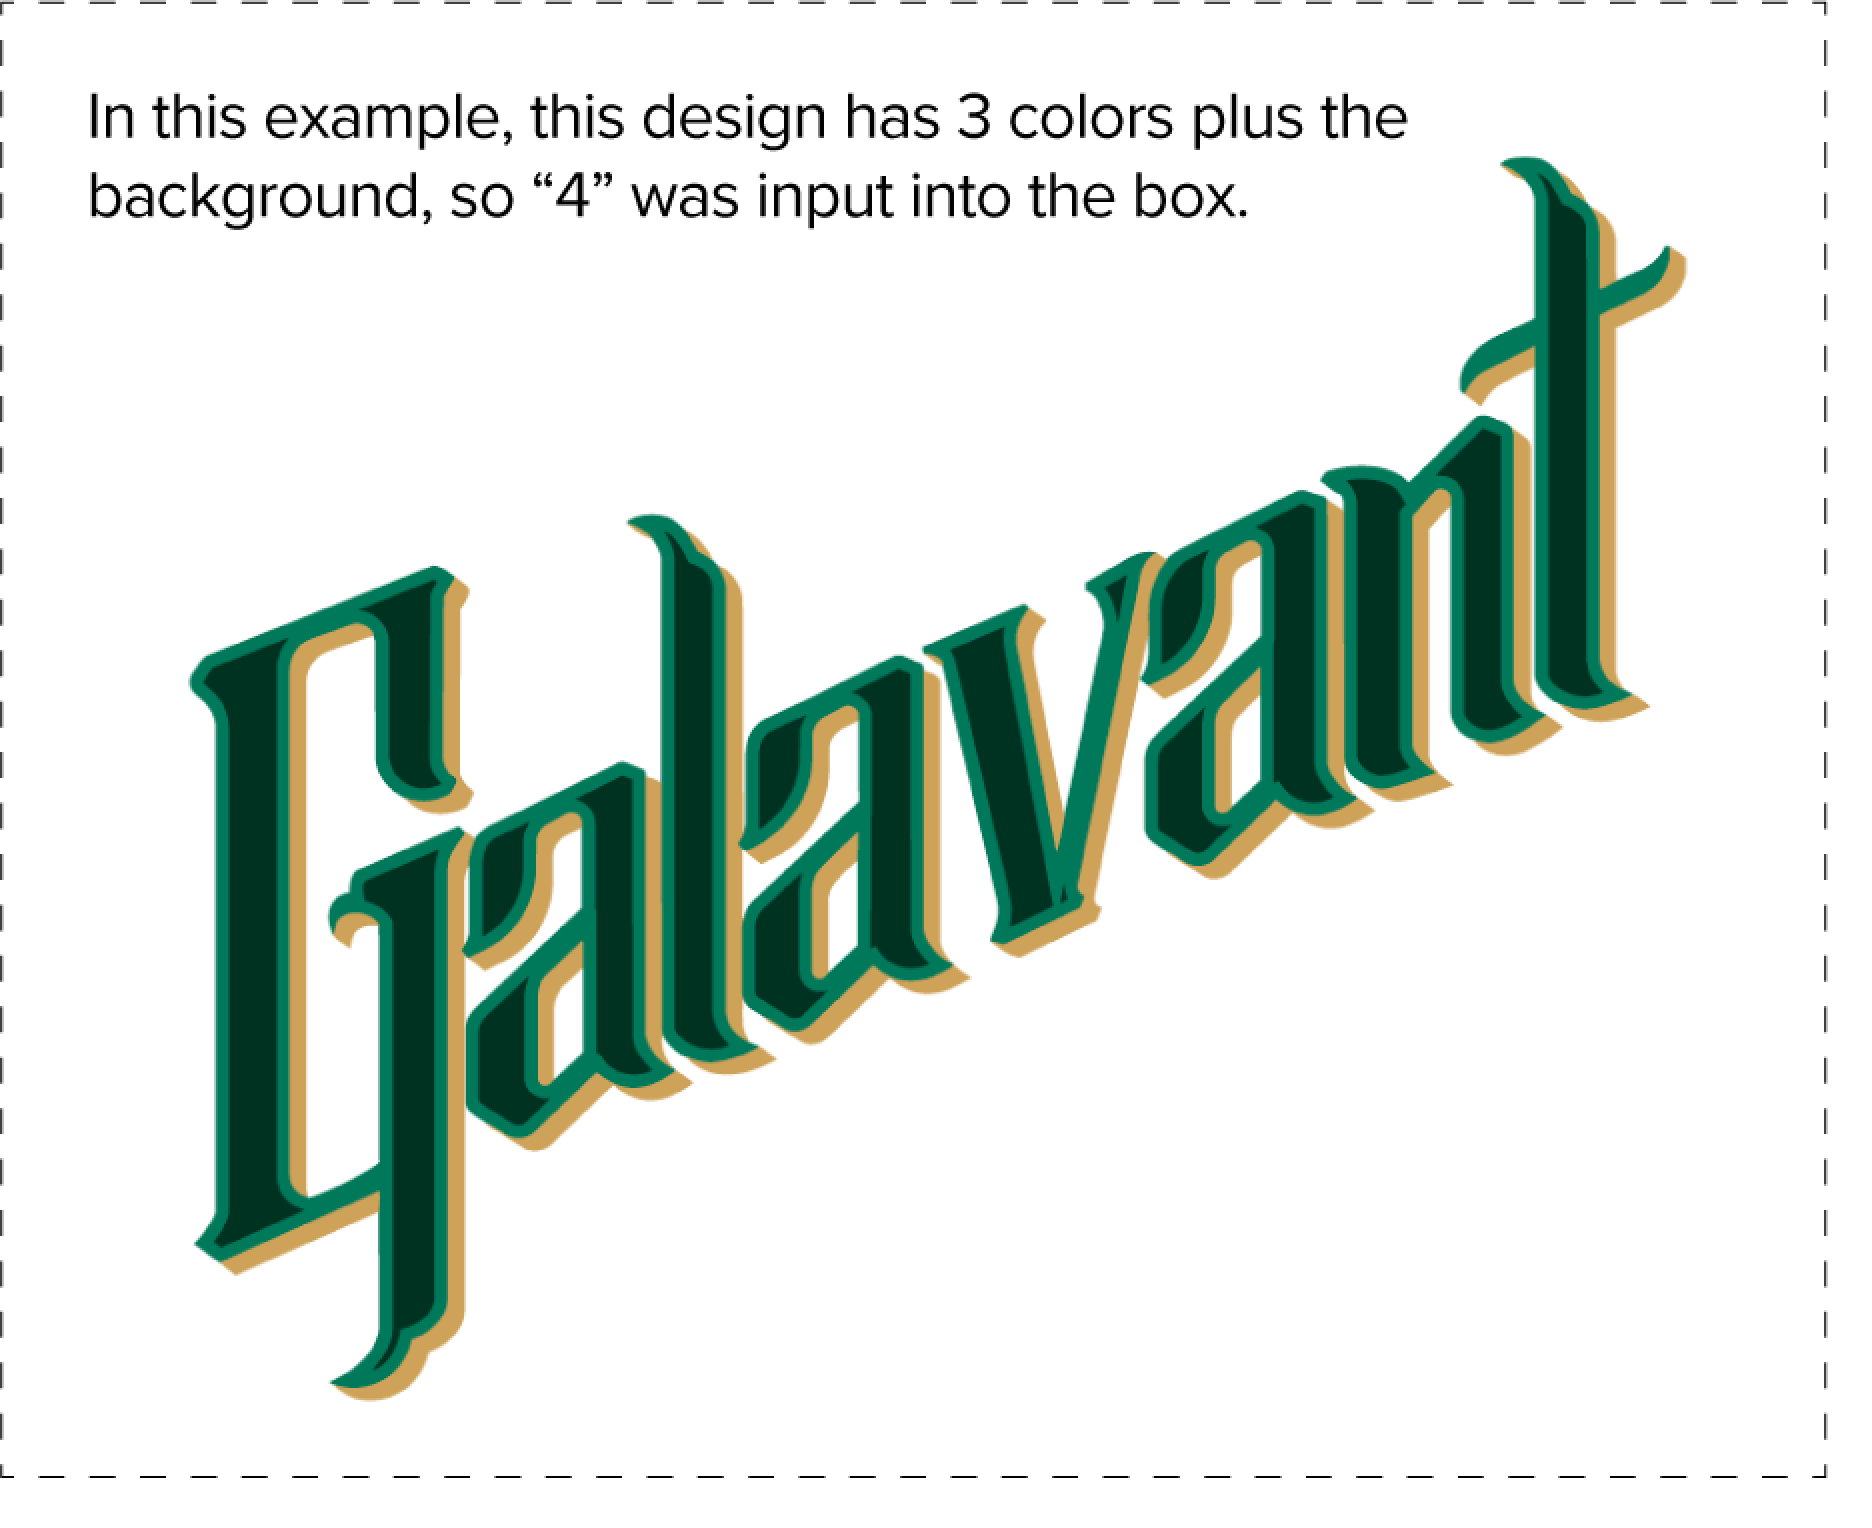
Next, select Color for the mode and Limited for palette then enter the number of colors that appear in your artwork, including the background color, in the colors slider.

Next, click the arrow to expand the Advanced options.
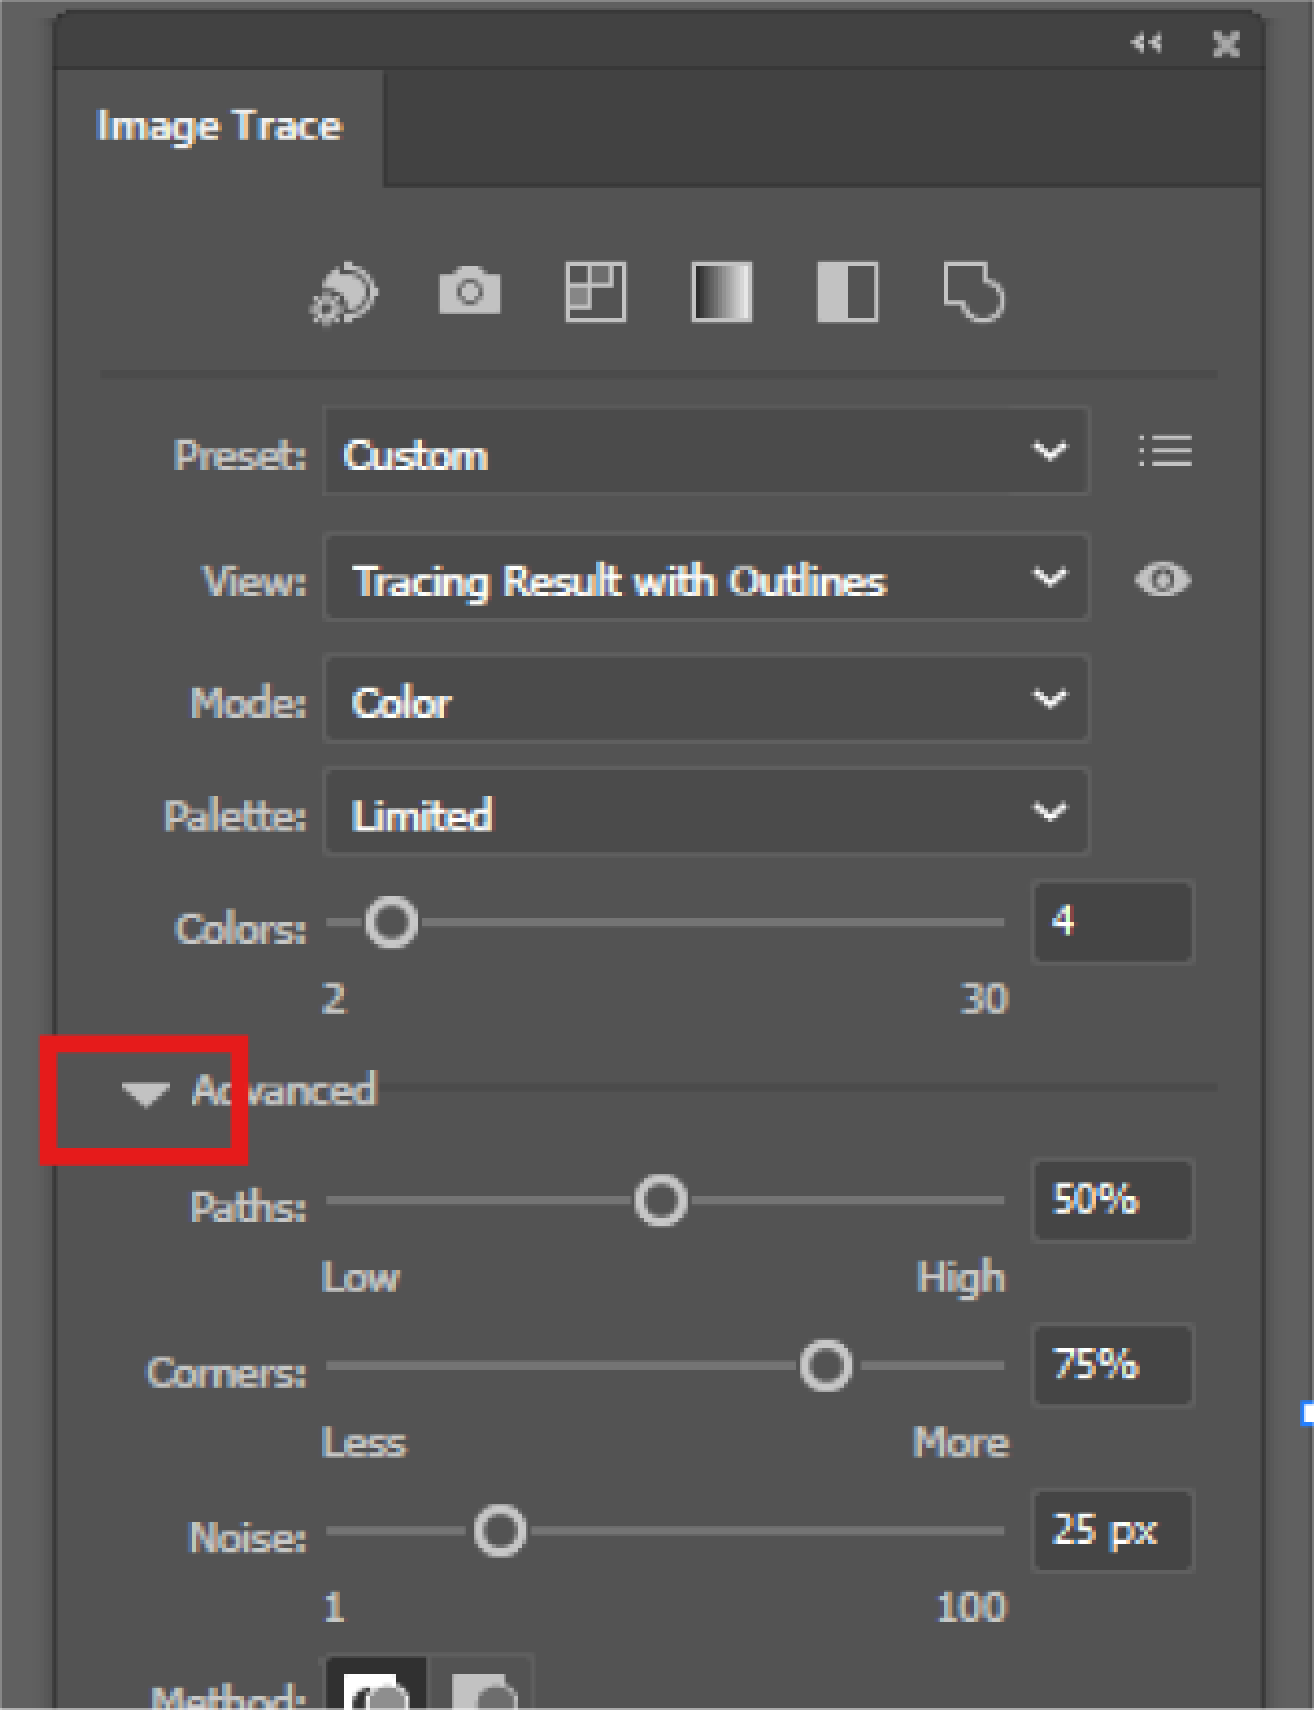 Settings here vary based on artwork type and detail level, but some general best practices are below:
Noise Slider: Adjust this slider first to remove any super fine details that won’t be perceivable to the naked eye. You’ll want this slider set more toward the right to minimize the amount of tiny shapes that are created. If too many details are lost in your design, slowly move the slider to the left until the details return.

![]()
Paths Slider: Typically, you’ll want the least amount of paths necessary to create the shapes. Start low with the path options and slide the slider towards high until the outlines start to look more like the original design
Corners Slider: This slider is heavily dependent on your artwork type. If you are tracing an image that has bold blocky text, you’ll probably want more corners. If you’re tracing something more organic and flowy, you’ll want less corners.
![]()
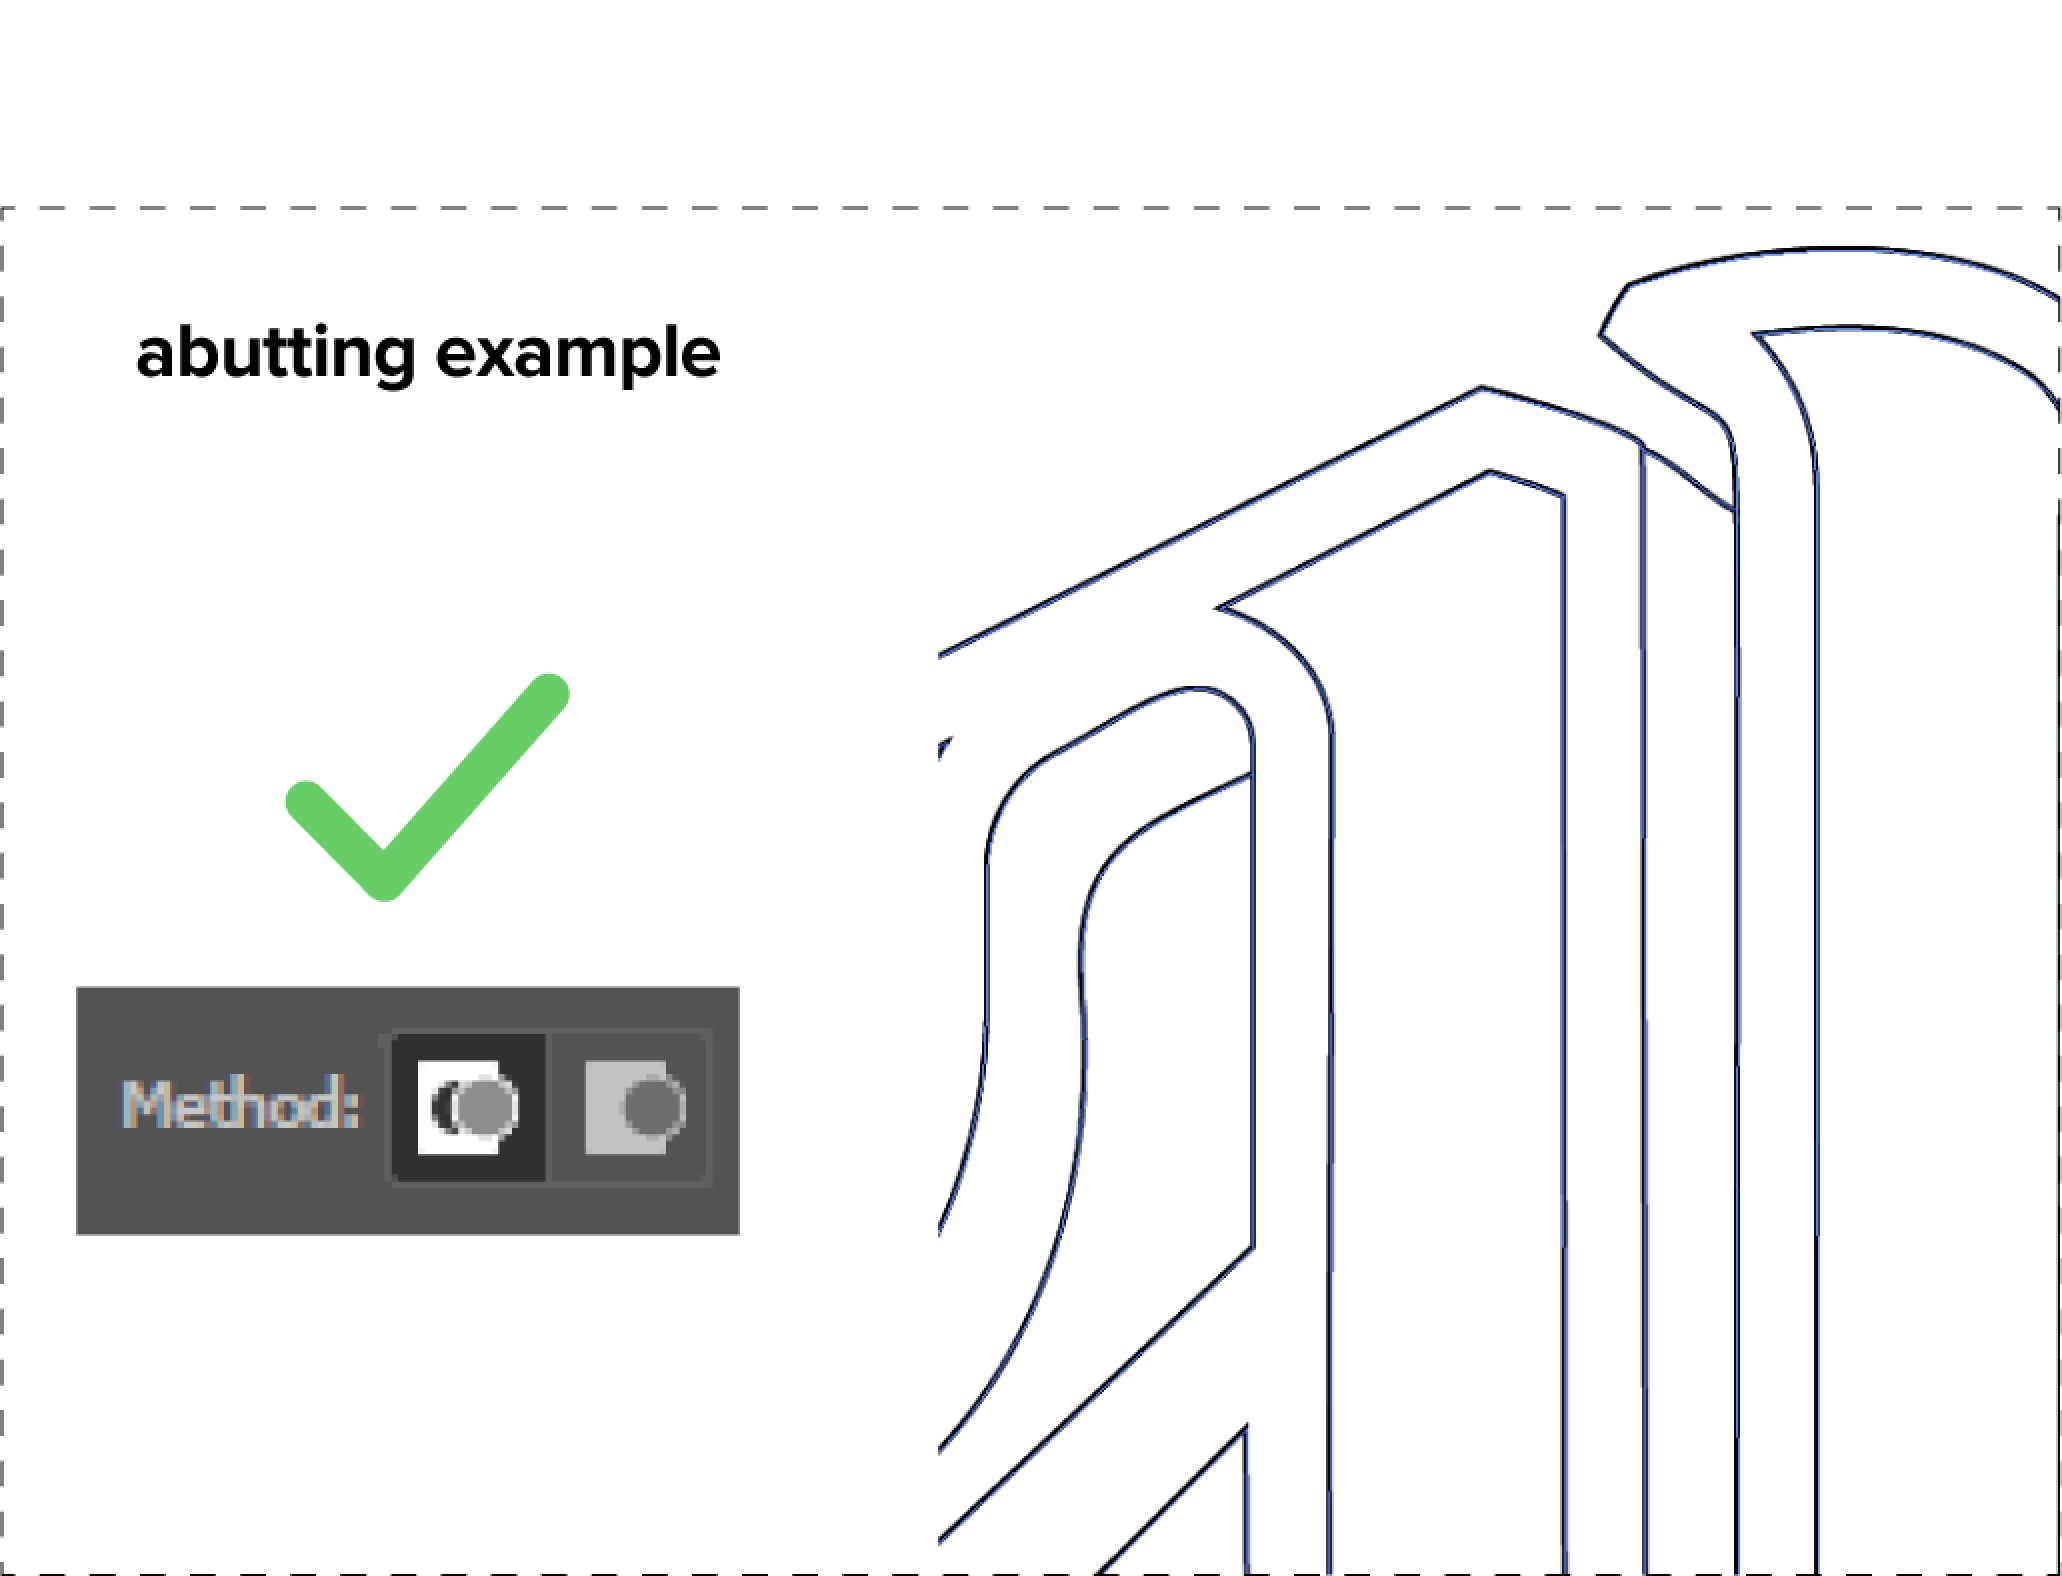
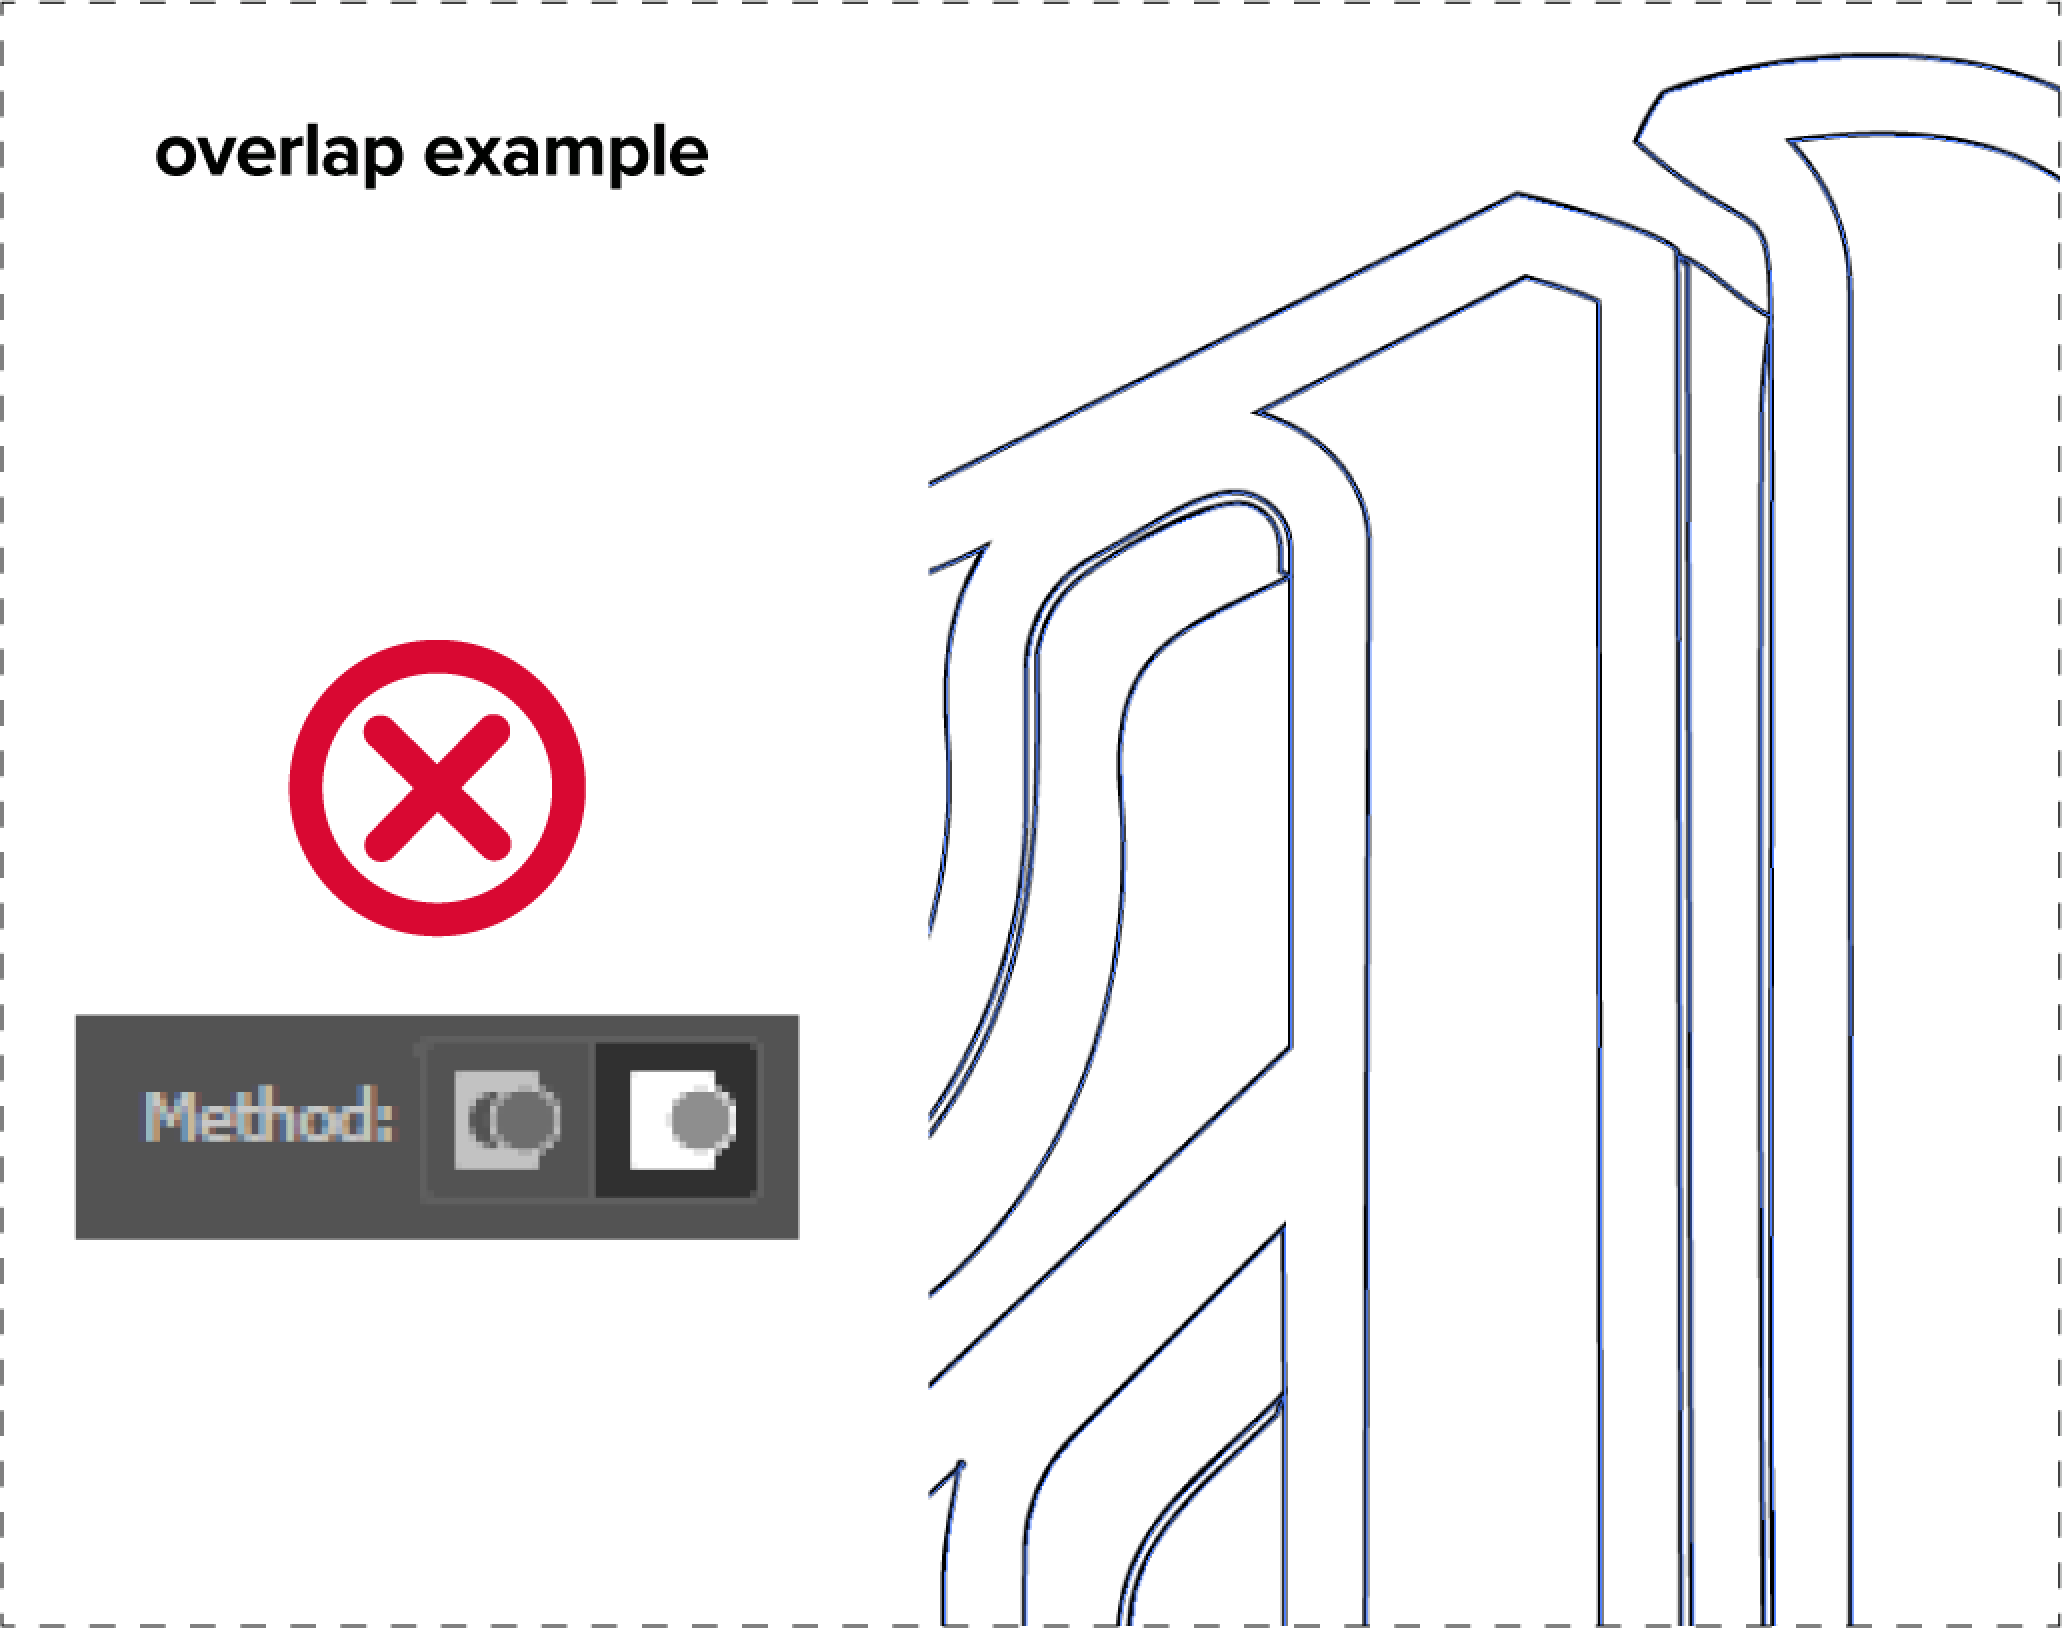
Method: Select abutting paths. This will help prevent thin un-wanted shapes that can be created by the overlap method.
Ignore Color: If your image has a white or single colored background that is not one of the colors in your design, check the ignore color box and use the eye dropper to select the background color. This will ignore the background color from the trace results and save you a step of deleting it later.
Click Expand and you’re done!
To save the file: Select your design and go to file > export selection. In the box that appears, click on the folder icon to select where you want to save the file. Then, select PDF from the format drop down. Click Export Asset to save.