You are only able to link one Fulfill Engine store to one Shopify store. The integration does not support a single Shopify store pushing orders to multiple Fulfill Engine stores.
Once you have generated a Client ID and Secret, you are then able to connect it to your account within Fulfill Engine
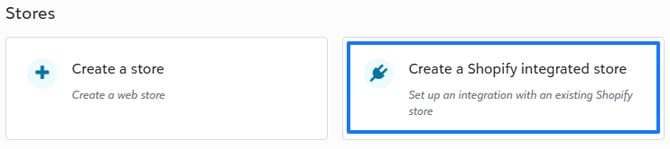
From your account, you will see the option to Create a Shopify integrated store. The "Create a store" tab to the left is the option you would select when opting to build a White-Label store vs connecting an existing Shopify store.
A prompt will then appear requesting store details for you to complete.
- The store name is the name of the Shopify store and how it should be displayed in the Fulfill Engine.
- The store name is the first part of the Shopify URL. For example, if the URL is sample-store.myshopify.com, then the store name is sample-store
- The Client ID and Secret are created within the Shopify Partner and Dev Dashboards. Follow our Shopify Integration Setup Guide if you do not have these items
Once complete, you will select Connect Shopify store.
Configuring Shopify
All front end appearances of the product will be handled within Shopify. This includes the ability to override Fulfill Engine's automated mockups, as well as setting the pricing and categories.
However, there are a few things that will still need to be set up within Shopify before the first order can be processed.
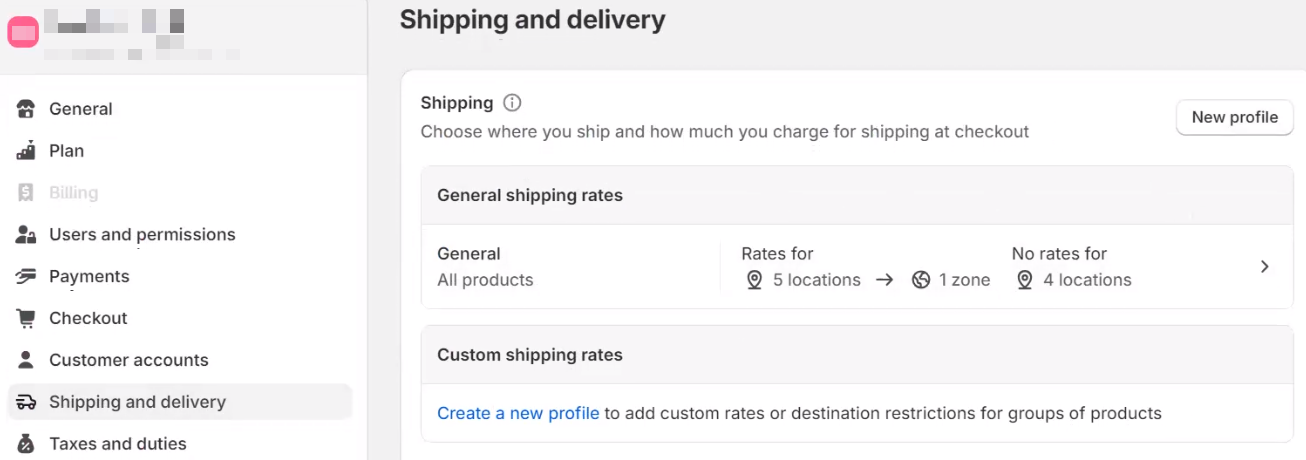
From the Settings section within the Shopify store you will select Shipping and delivery. From this view, the first thing you will need to do is establish the General shipping rates.
Within Shopify, this is where you manage shipping zones and correlating shipping cost. Examples of this could be setting up the stores shipping option as flat rate, weight based, or any special rules such as free shipping after a specific dollar amount.
If you already have General shipping rates set, you will need to apply them to the custom application.
You are able to select the shipping options to match the verbiage within Fulfill Engine to generate shipping labels with production through the automation. Below are recognized names which are case sensitive;
- Economy
- UPS Ground or UPS® Ground
- UPS 3 Day Select or UPS 3 Day Select®, 3 Day, Three Day
- UPS 2 Day Air or UPS 2 Day Air®, 2 Day, Two Day
- UPS Next Day Air or UPS Next Day Air® / Next Day
- USPS Priority Mail
- USPS First Class Mail
- USPS Ground Advantage
- USPS First Class Mail International
- Globalpost Economy
- Globalpost Priority
If one of the above methods is not selected, the system will use whatever Standard shipping method is set up within the store level on Fulfill Engine.
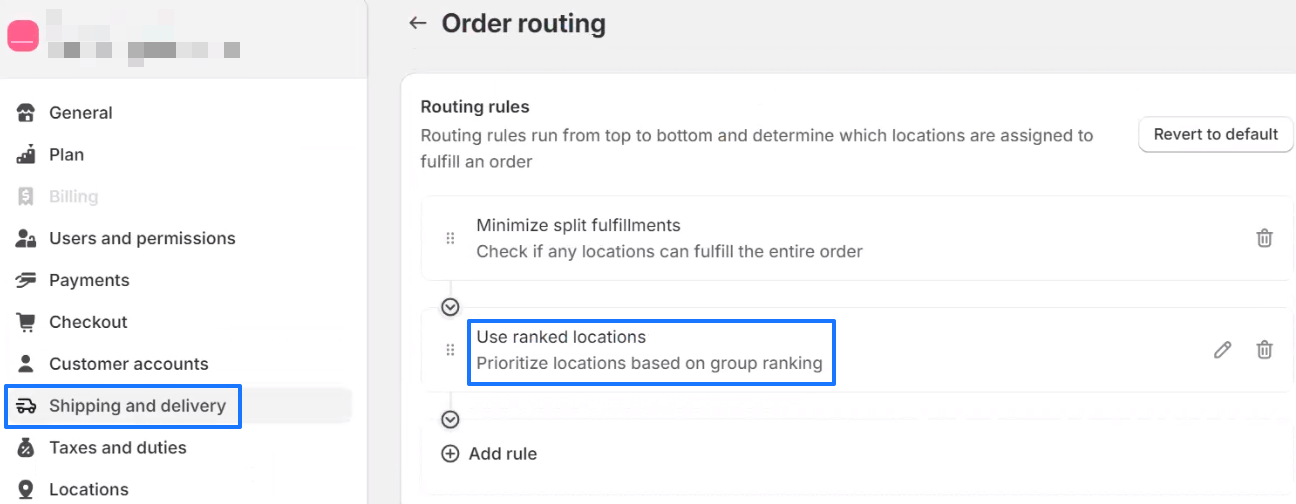
Going back to the Shipping and delivery view, the next thing that will need to be set up is Order routing. Fulfillment will be determined based on these rules and if an item is connected to Fulfill Engine, this step will be the last step in the connection.
Adding New Products to your Shopify Store
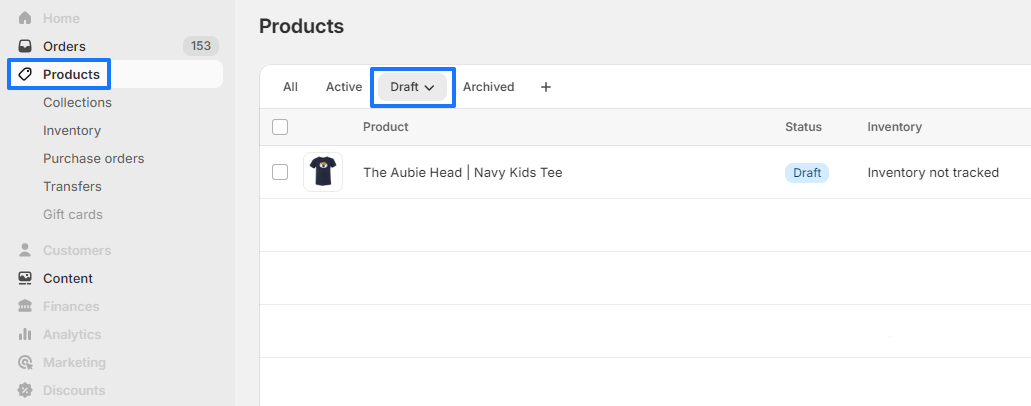
When on your customer's Shopify store dashboard, you will select the Products option > then select to +Add a new product.
You will then be prompted to select your decoration method and product.
The Network Product Catalog is connected to Fulfill Engine's integrated suppliers. If there is something you don't see, you can request it here.
1. Upload art: upon selecting the garment, you are able to select your art file and select the size, placement, and other details.
Our digitizing services are a flat $20 fee per file and the file will be provided to you.
2. Select the garment colors. You are able to offer your design on a variety of garment colors with a few clicks.
When you select the garment colors, a mockup will automatically generate on the right hand side. If you have art set on the back and/or sleeve(s) of the design, easily select the location to view the mockup.
These are the mockups that will auto generate to your customers Shopify store.
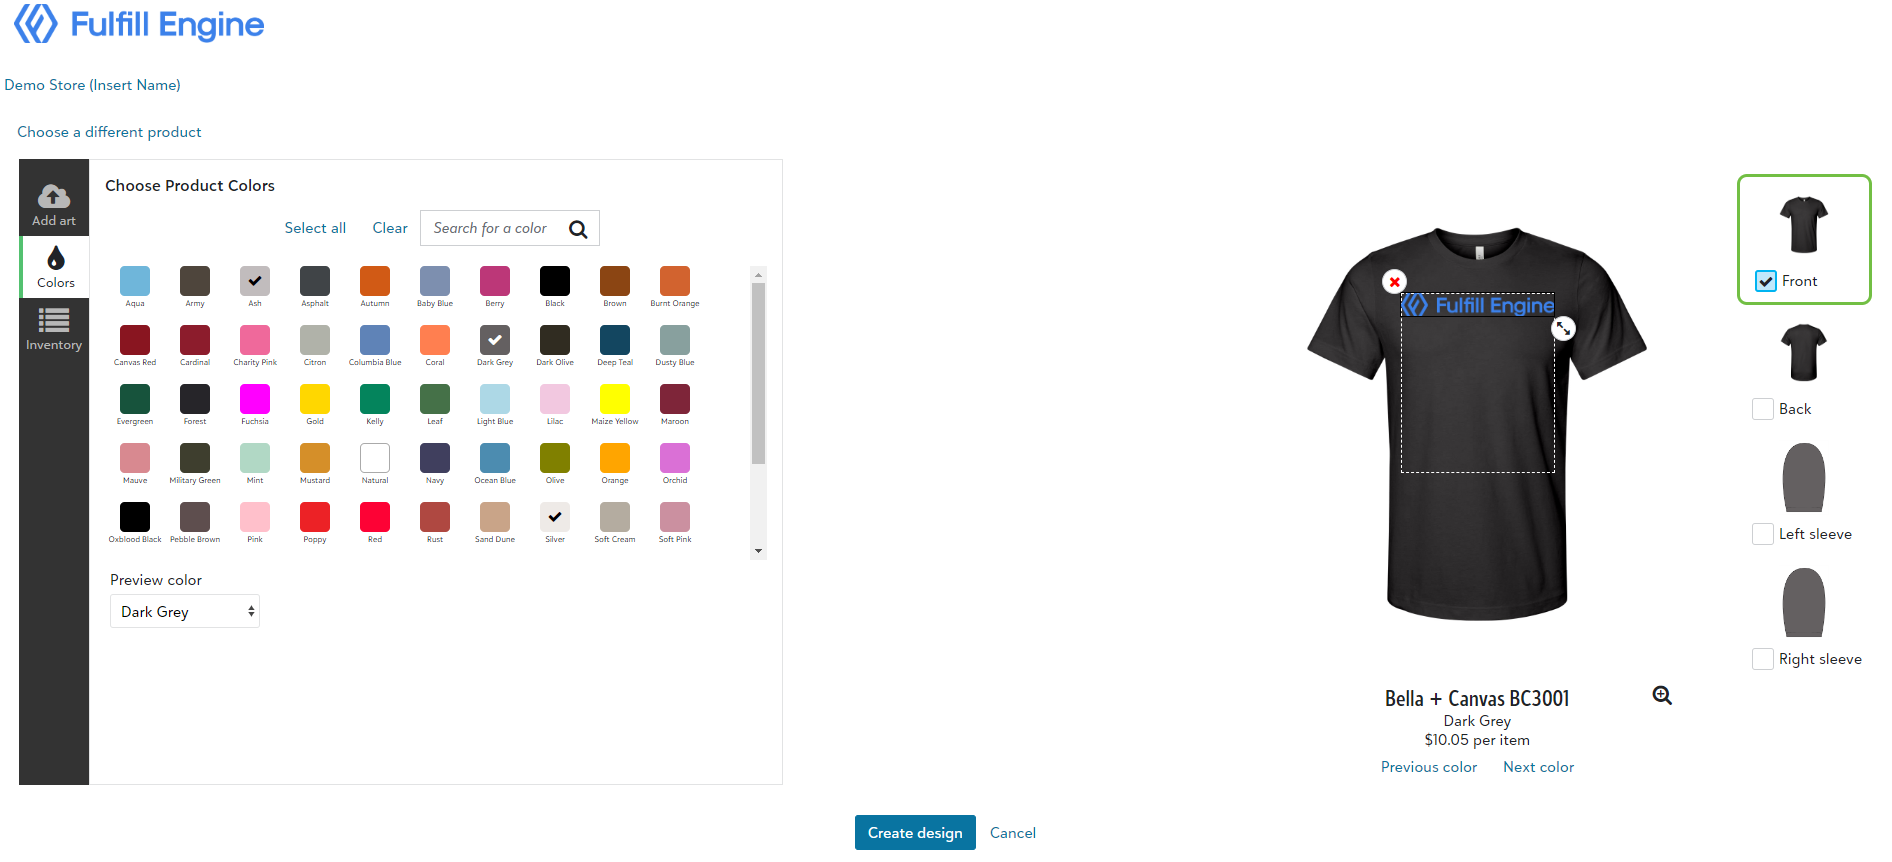
3. Confirm inventory: if an item is low on inventory a warning will populate. Since our inventory is pulled live from the suppliers, if something goes out of stock, any orders will show within product sourcing rules.
4. Create and name product: select create design and you will see a popup asking you to name the product.

When the product is saved, it will show within the Shopify store as a Draft. This is where pricing will be set as well as product description, and the ability to update new mockup images.
Once the product is moved to active, any time it is ordered, it will route to Fulfill Engine!
Link Existing Products from your Shopify Store
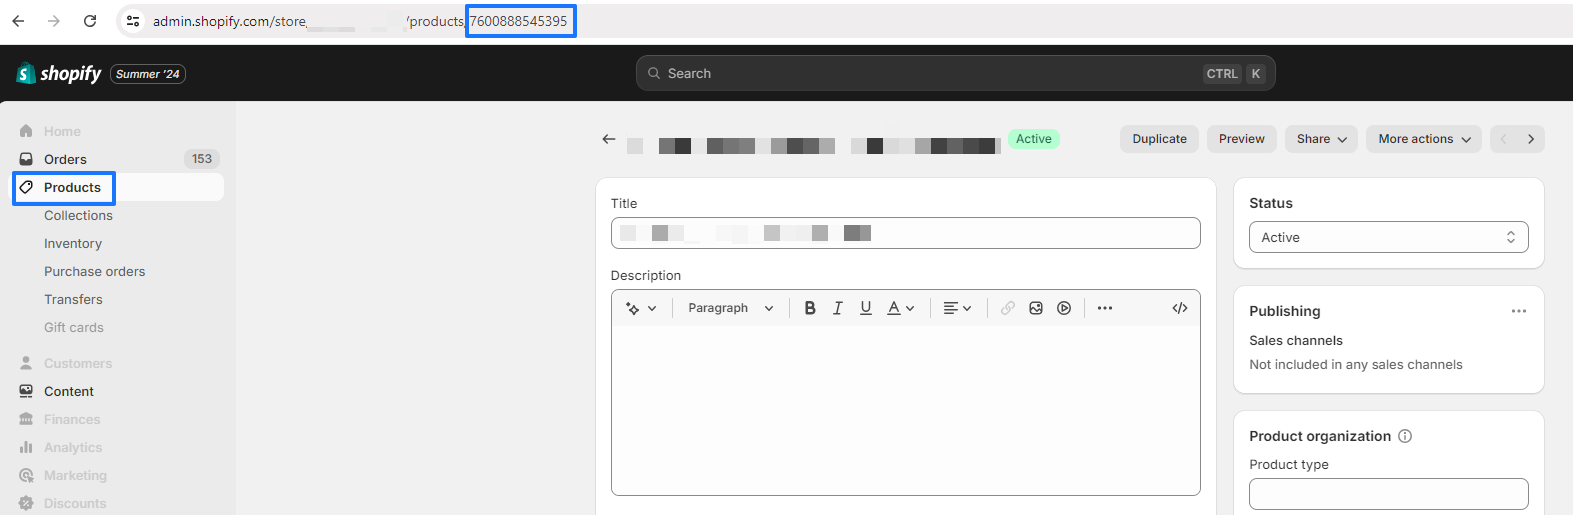
When on your customer's Shopify store dashboard, you will select the Products option > then select to +Add a new product > Import existing POD Products from Shopify.

This will prompt you to enter the Shopify product id which can be found on the Shopify product page, at the end of the URL.
Once connected, you will follow the same prompts for a new product add selecting the decoration method, garment, upload art file, and set placement/ size.
Rejected Orders
The two most common reason for an order to not be accepted by Fulfill Engine for fulfillment are due to routing or an unassigned shipping profile.
If you are experiencing a rejection, please review the above steps to ensure your Shopify store is correctly configured to communicate with Fulfill Engine.
Further help can be provided by granting Fulfill Engine Collaborator Access to your Shopify. To do so, reach out to info@fulfillengine.com with your Shopify store name, this is the part of the URL before .myshopify.com as well as a 4-digit collaborator code. Follow the below steps to access that code.
- From your Shopify admin, click Settings > Users and permissions.
- In the Collaborators section, click Generate new code.
- In the Generate new collaborator request code dialog, click Generate code to confirm.
Collaboration access can be revoked at any time, and will not impact the automation of integrated products. Access will expire within 90 days of not logging into the store, but can be requested again at any time.